Webspark is the ASU enterprise's Drupal-based content management system distribution supported by the Enterprise Technology. Webspark offers turn-key, easy-to-use, web standards compliant, website building compatible with Arizona State University Rational Information Technology Environment (ASURITE) authentication. Features include slideshows, accordions, carousels, iSearch pages, ASU News, ASU Events and more.
Webspark 1, sunsetting
Webspark versions are changing to enhance the ASU website (asu.edu) user experience in favor of accessibility and evolving web standards compliance. Webspark 1, utilizing the Drupal 7 framework, assets have been modified and archived to support the transition.
Webspark 1 will no longer be supported in Spring 2022.
- If you have a website to build or questions regarding an existing site, connect with the ASU web community via Slack.
- Webspark 1 training resources have been archived. View the archived Webspark 1 materials document.
Webspark 2, available through Pantheon upstreams
Webspark 2 utilizes the new Drupal 9 framework, web standards, accessibility and enhanced user experience for all of ASU’s diverse audiences. Webspark 2 leverages advances in website development at ASU by using the Unity Design System.
We recommend that everyone considering the creation or spin-up of a new website, or migrating an old website from Drupal 7 to Drupal 9, use the Webspark 2 upstream available via the Arizona State University via Pantheon.
For added guidance regarding this effort, see the building an asu.edu website tools, training and resources page, join the ASU Slack web community for updates or email us.
Spin up a free Webspark site
Step 1
If you don't have a Pantheon account, fill out the request for Organization Membership webform below to request an account. Once your Pantheon account has been provisioned, use your [email protected] email address to sign into Pantheon using ASU SSO.

Step 2
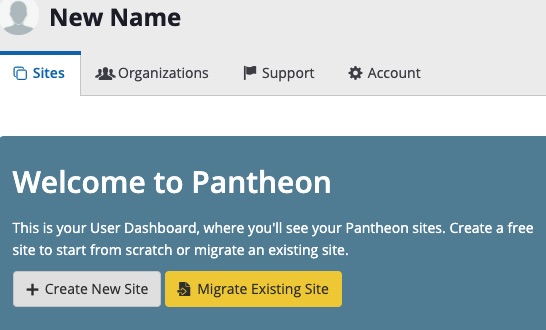
You'll be taken to a welcome page. Click the Create your first site button.
Step 3
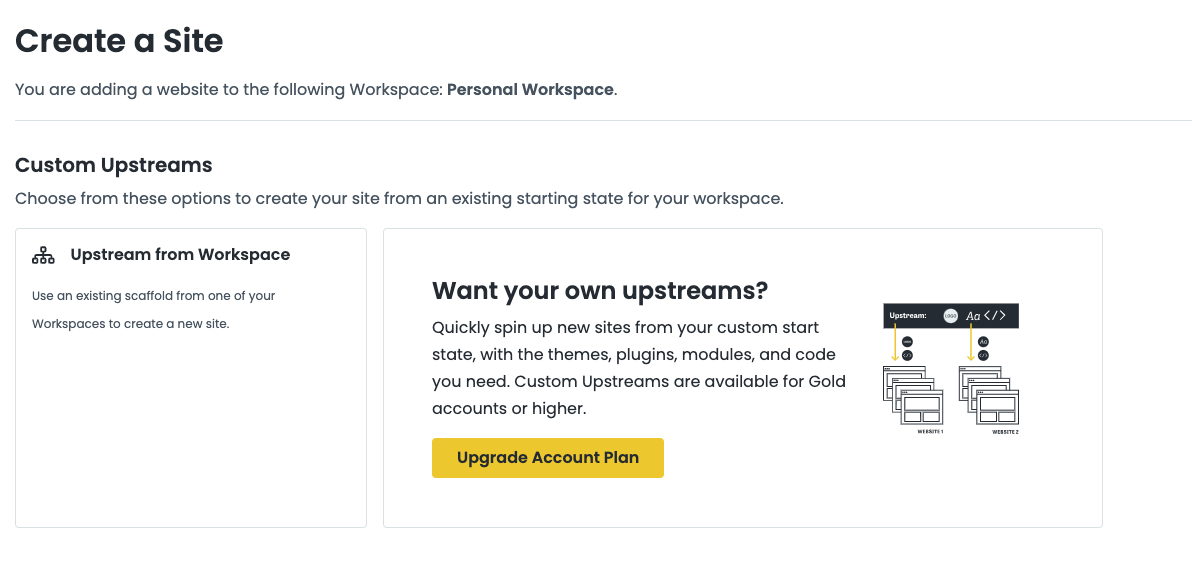
Select Custom Upstream.

Step 4
You'll be prompted to select a custom upstream. Select Upstream from Workspace.
Step 5
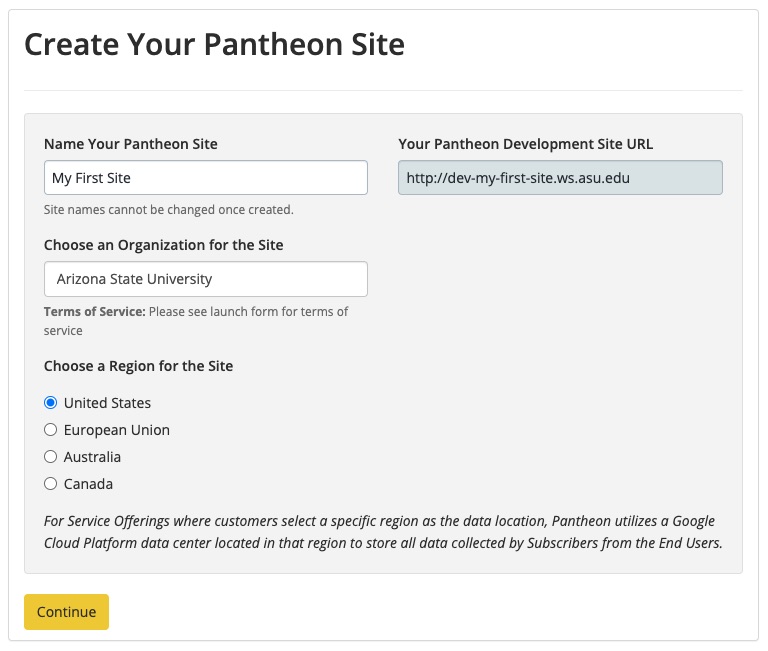
On the next page, give your site a working name. Something short and relevant is best, as you won't be able to change this URL later. Click Create Site.
Step 4
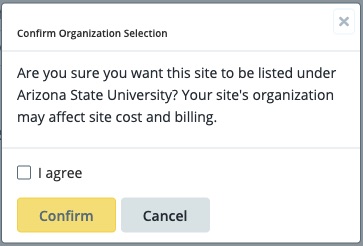
Select I agree on the pop-up that appears and Continue.
Step 6
It may take a few minutes to spin up a site. Once you see the Your site is ready screen, click Visit your Pantheon dashboard.


Step 7
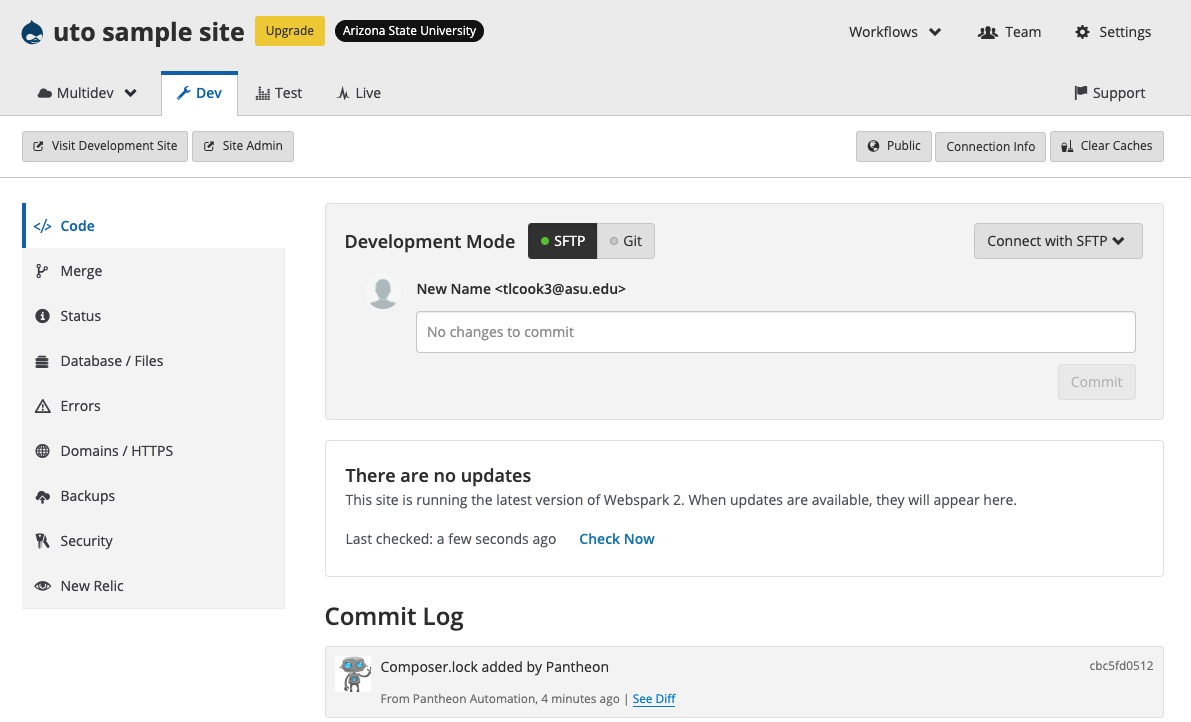
Your Pantheon dashboard can look overwhelming at first. For now, just click the “Visit Development Site” button in the upper left. (To learn more about the Pantheon dashboard, read https://pantheon.io/docs/sites/.)
Step 8
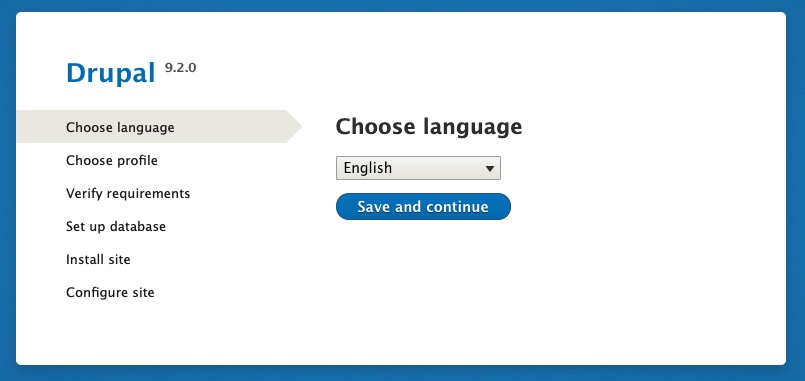
You're now going to install the Drupal software to your site. Click the Save and continue button.
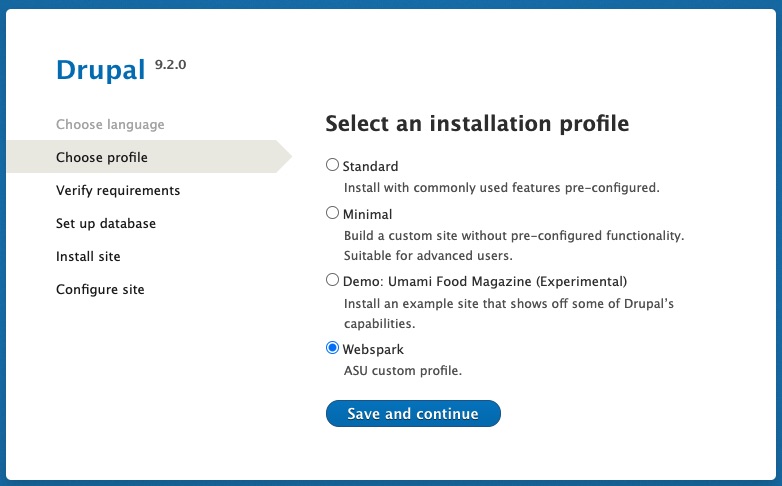
Select installation profile for Webspark and fill in next steps.
Step 9
It may take a few minutes to install the software. Once it does, you'll be taken to the site configuration page. Fill out the information requested:
- Name — is already filled out for you, but you may change it now or later through your site settings.
- Site email address — choose a reachable email address (not required to be an @asu.edu email).
- Username — you may change the name of this user, but choose something generic. This is User 1, who has super admin access and stays with the site, even when actual personnel change.
- Email address — User 1 usually is given the same email as the Site email address above.
- Password — choose a strong password and remember or record it.
ASURITE user ID — leave this blank in case of personnel changes or you need to change the User 1 password quickly (you won't want it associated with an ASURITE password).
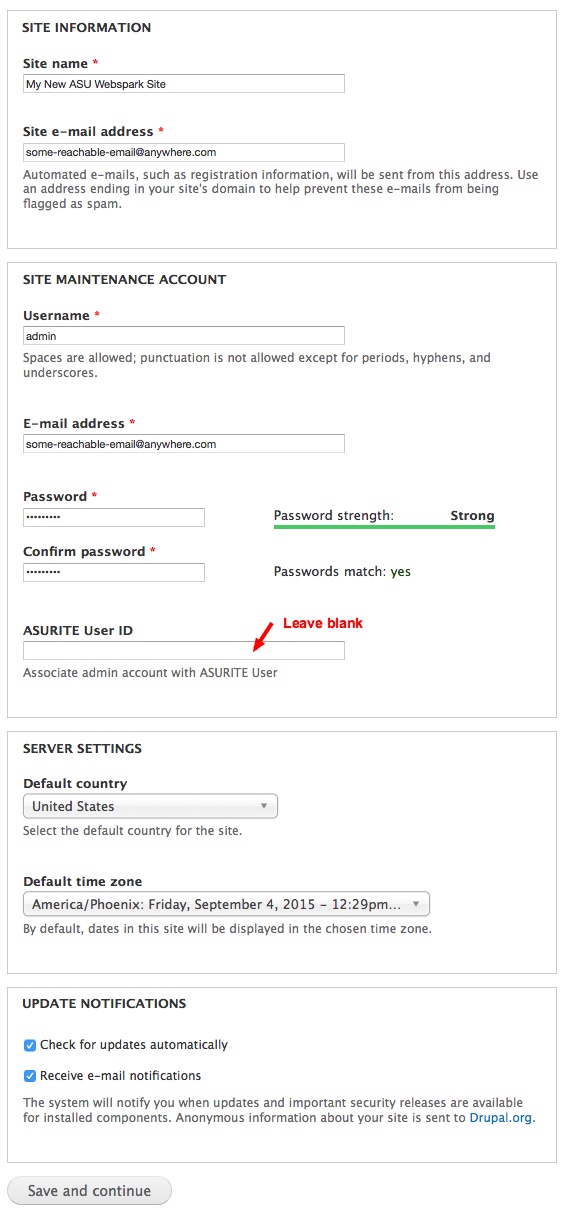
Click Save and continue, then on the next screen, click Visit your new site.
Congratulations! You've spun up your first Webspark site.
You can return to your Pantheon dashboard by visiting https://dashboard.pantheon.io.
Want more information? See Pantheon's documentation or sign up for Pantheon's in-depth training.
For those of you who want to access the Webspark 2 / Drupal 9 upstream via GitHub repositories, please go to https://github.com/ASUWebPlatforms/webspark-upstream.git.
